Binding is a great way to add some additional protection to your electric guitar while making it a bit prettier. There are many options to choose from, and picking the right one will add a nice touch to your guitar. With some basic woodworking skills, tools, and patience, you can make your guitar even cooler with some binding.
To install binding on your guitar, you need to prepare a router. You’ll have to choose the binding and gluing method. Use acetone for plastic binding and wood glue for wood binding. Use the router to cut a channel for the binding, glue it on, and then scrape off the excess.
This article will give you a detailed step-by-step guide on how to install binding on your guitar. We’ll go over the tools you need, the options you have, and what steps you need to take so you’ll be able to quickly and easily install binding on your guitar.
How To Put Binding on an Electric Guitar: 9 Steps
- Install It Before the Guitar Is Finished
- Choose the Material and Color
- Prepare Your Router
- Prepare Your Glue
- Inspect Your Guitar and Fix Imperfections
- Avoid Tear-Out While Routing
- Glue the Binding
- Scrape Off Excess Binding
- Apply a Finish to the Guitar
If you want to find out what my recommended guitar gear is, then here is what I recommend on Amazon:
- Fender Cutaway Acoustic-Electric Guitar Bundle (MY FAVORITE GUITAR)
- Snark SN-8 Super Tight All Instrument Tuner (Easiest Tuner I’ve Used😏)
- 6 String Acoustic Guitar Capo (Best CAPO for quick changes)
- Dunlop Max Grip 1.0mm Nylon Picks (Thick Guitar Pick So You Don’t Lose Grip!)
- Universal Guitar Stand (Cheap & Minimalist Guitar Stand I Recommend)
- Levy’s 2″ Wide Quick Adjust Guitar Strap (Best Guitar Strap For Any Level)

1. Install It Before the Guitar Is Finished
Binding is easiest to install during the building process. Once the guitar is finished, you risk damaging it and running into additional costs. You might damage the finish, which will mean that you have to repaint your guitar. Even worse, you might damage the frets, and replacing them usually doesn’t come cheap.
While the guitar is still being built, you can easily fix mistakes and cover them with paint later on so nobody can see them. Even if a part is more seriously damaged, you can replace it and start again. It’s much greater damage when this happens to a finished guitar.
This is not to say that it’s impossible to add binding to a guitar that’s finished. If you’re a good woodworker, you can probably pull it off. However, it’s not advisable because the risks outweigh the benefits. Buying a new guitar with binding might be cheaper than installing binding and then repairing the damage.
2. Choose the Material and Color
Guitar binding is usually made of wood or plastic. Plastic is easier to work with and easier to shape and glue on. Wood is not as easy to work with, but it looks classier and adds a nice vintage vibe to the guitar.
When it comes to colors, you can usually choose between:
- White
- Black
- Cream
The combination of black and white is also popular. You can also choose between certain patterns. The herringbone pattern is particularly popular. Binding with patterns is often referred to as purfling.
You can pick a color that matches the color of your guitar, but it’s also a great choice to get binding that offsets the guitar’s color. For example, you can add white binding to a black guitar to get a striking, stylish visual effect.
If you only want binding for some additional protection and don’t want it to stand out too much, choose a binding that’s the same color as the guitar. Black binding on a black guitar will barely be noticeable but will still get the job done.
You should also pay attention to the thickness of the binding. Thicker binding will be more forgivable since imperfections will be harder to spot. There are a few thicknesses you can choose from.
- 0.040” (1.016 mm)
- 0.060” (1.524 mm)
- 0.090” (2.286 mm)
- 0.120” (3.048 mm)
If this is your first time working with binding, it’s best to opt for something thicker. There will be a greater margin of error that way, so you’ll be able to go back and fix things if necessary. Don’t use the thinnest binding as it’s difficult to work with, and it is not meant for guitars but rather for banjos, mandolins, and similar small instruments.

3. Prepare Your Router
You’ll need to create a channel for the binding. For that task, you’ll need a router. A hand-held router will get the job done, but many prefer laminate routers, which are slightly smaller. You should use the one that you’re most familiar with, and you’re certain will work well.
Whichever tool you decide to use, you’ll have to adjust its height. You can do that by taking a piece of your binding and putting it next to the router cutter. The cutter should be just under the top of the binding.
The cutter should also be set up so that a little bit of the width of the binding pokes out. It shouldn’t be more than a millimeter, but you want to have something extra. You’ll scrape it down later, allowing your binding to sit flush with the guitar’s body.
Setting it up this way will allow a bit of the binding to stick out after you glue it on. This is okay because you’ll scrape it once it’s firmly glued, and it’s much better to have something extra you can scrape off than to have a binding that’s below the guitar’s top.
Don’t forget to use a scrap piece of wood for a test cut. You don’t want to start cutting your guitar only to realize that the channel is too deep or too shallow. Adjust your cutter until you get the perfect depth for your binding channel.
4. Prepare Your Glue
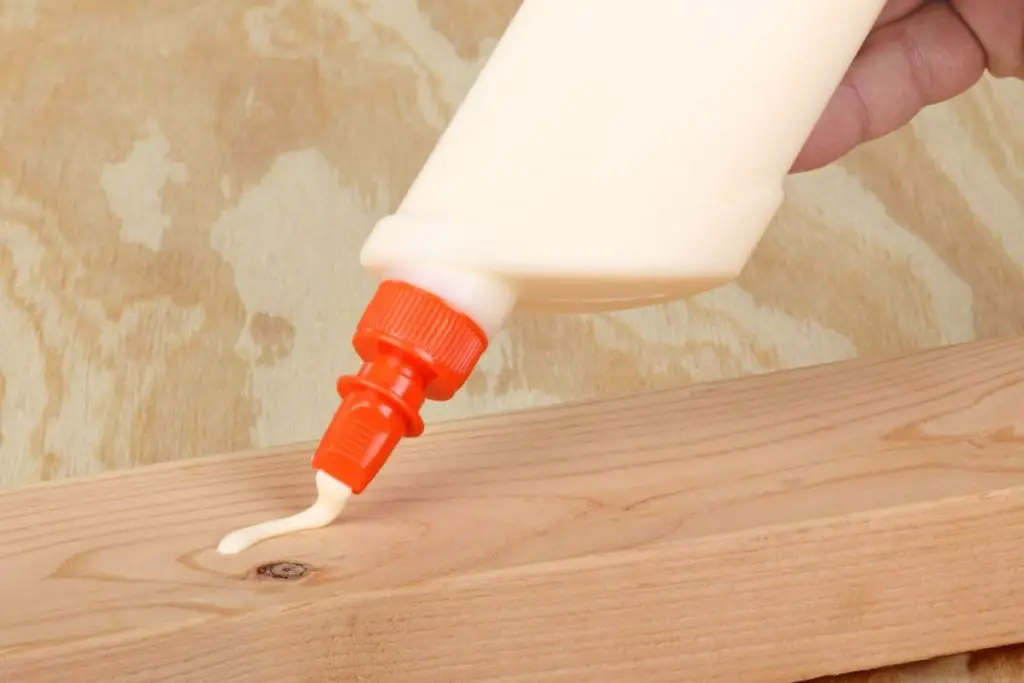
You’ll have to use wood glue if you’re working with wood binding. Pretty much any wood glue will get the job done. You can also use super glue, but it’s not advisable if this is your first binding job. Super glue dries extremely quickly, so if you mess something up, it might be impossible to fix.
When it comes to plastic bindings, you can also use glue, but you can use acetone instead. Acetone does a pretty good job because it melts the plastic, so it attaches to the wood and doesn’t come off easily.
You can also find a special glue for guitar bindings if you want a more professional feel to your work. Use whatever you prefer and think will do the best job. There’s a lot of choice here, so it’s easy to find something that suits you.
5. Inspect Your Guitar and Fix Imperfections
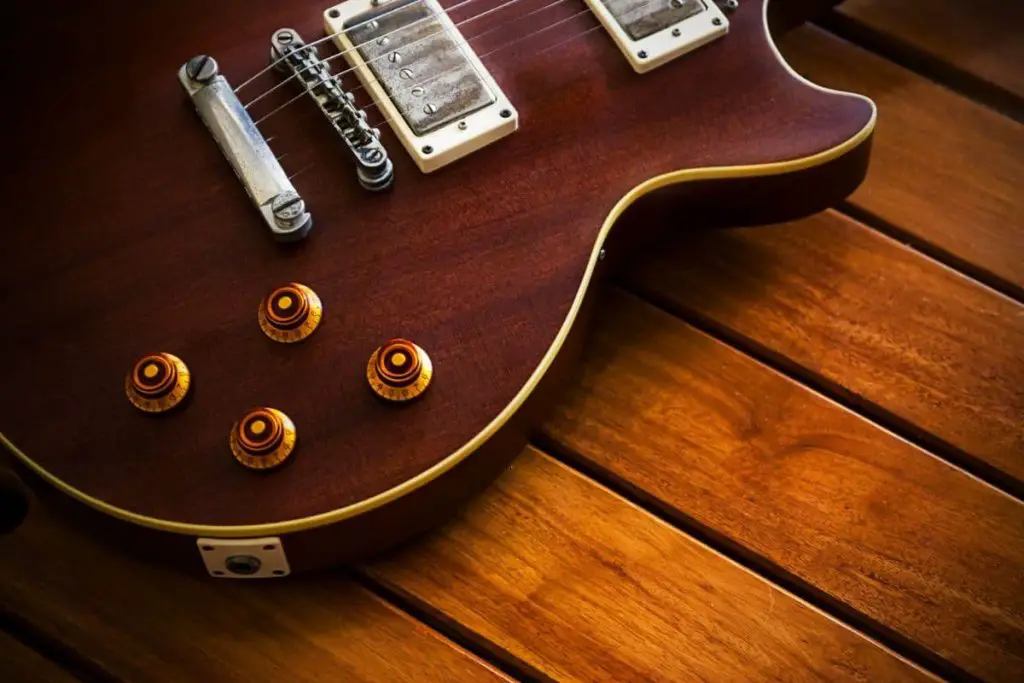
Before you start cutting a channel in your guitar, you have to ensure the wood on your guitar’s side is perfectly smooth, so you get an evenly-cut channel. Your cutter will faithfully trace whatever is on your guitar, so if you don’t smooth it out, you won’t get a very good result.
You can use a straightedge to look for bumps and imperfections. Use sandpaper to even them out. Be careful and work slowly, so you don’t damage the wood.
Of course, this step will most likely be unnecessary if you’re working with a store-bought guitar as the wood will be smooth. On the other hand, if you’re building a new guitar, the step is absolutely mandatory, and you’ll have to do this with absolute focus.
If the channel ends up being uneven, it will be impossible to glue the binding on it and make it stay there. Not to mention that the aesthetic effect will be diminished.
6. Avoid Tear-Out While Routing
Once your router is set up, and your guitar is as smooth as it can be, you should secure it, so it doesn’t move while you’re routing. You can clamp it down, making sure it’s tight enough without damaging the guitar.
Once you start routing, you should be careful to avoid wood tear-out. This is particularly important with long-grain wood such as spruce. However, it can always happen during routing, so you need to take precautions.
You should never run the router around the whole body of the guitar in one go. That’s a guaranteed way to tear out wood. You should start with the corners, cutting them in a clockwise motion slowly and carefully.
After that, you can make one final pass in a counter-clockwise direction to clean everything up and make sure it’s perfectly smooth. Cutting in this way will minimize the chance of tear-out, so you won’t have to start over.
You can see why putting binding on a guitar after building is not a good idea. Wood tear-out on it would completely destroy it, and it’s doubtful if it could ever be brought back to its initial state.
7. Glue the Binding
Before you glue the binding to the guitar, you have to bend it. You can find pre-bent binding, but it’s doubtful if it will suit the guitar you’re building, so it’s best to get regular binding and bend it yourself. You need to be careful, so it actually matches the guitar’s shape.
If you have plastic binding, you’ll have an easier time. You can use a hairdryer or a heat gun to warm it up and make it bendable. If you’re using a heat gun, hold it some eight inches away from the binding, so you don’t damage it.
Move the heat up and down, so everything gets evenly warm and soft. Binding droops when it becomes soft, so watch out for that, and don’t let it melt too much. You don’t want to turn it into a puddle.
When it comes to wood binding, you have to make it wet and expose it to a heat source. You can’t use a heat gun. Instead, you should use a bending iron. Don’t expose it directly to it. It’s best to use a thin piece of metal, so the binding doesn’t burn.
Once your binding is nice and bendy, apply glue or acetone to the channel. Add the binding while it’s still warm, so it fits snugly around the guitar. If you let the binding cool down, the effort to soften it will go to waste.
Use any kind of tape to hold the binding in place. Pay extra attention when you remove the tape, so you don’t damage the guitar. Remove it carefully, bit by bit, so you don’t damage the wood. The binding will need between six and eight hours to stick to the guitar.
You can also use large binding bands to keep the binding in place. It’s a good idea if you don’t want to risk damaging your guitar with tape.
Pay Attention to the Joints
There are a few ways you can join pieces of binding together. If you’ve got plastic bindings, it’s easier to make the joints invisible because you can melt them together. Here are your joint choices:
- Butt joints: These are simple upright joints that are great for plastic bindings. You can melt them together with bind-all cement or acetone and create a long, seamless piece of binding. However, this joint can work really well with wood binding, too.
- Scarf joints: These are similar to butt joints, but they’re angled. They can be angled across the side or the top. At a right angle, the glue won’t cut across the binding, so it’s a good way to create a hidden joint.
- Miter joints: These joints are a good choice for corners and angles. Two pieces of binding are cut at a 45-degree angle (most commonly), and these sharpened pieces are then joined to form a corner.
- Lap joints: A lap joint means that two pieces of binding will overlap. This joint is not as good-looking as a miter joint, but it is much easier to construct. If you’re a beginner at this, it’s best to go for lap joints on corners.
Fill in the Gaps
If your binding doesn’t sit perfectly on the body, that is, you have some gaps between it and the guitar; you have to fill in those gaps. You can do this quite easily with some binding shavings and acetone.
You should take the shavings and soak them in acetone until they dissolve. They will form a gooey substance that you can pour into the gaps to close them. They will melt together with the binding and wood, and nobody will be able to notice anything after you paint your guitar.
8. Scrape Off Excess Binding
Once the binding sits firmly in place, and you can see it’s not going anywhere, it’s time for scraping. You need to do this to make the binding even with the rest of the guitar’s body. The simplest way to do this is to use a card scraper.
There are specialized binding scrapers, too, but card scrapers are easier to find, so it’s simpler to just use them. You’ll also need a razor to deal with some small details that are difficult to get with a scraper.
You can lay your guitar on a flat surface and start scraping slowly. You can get someone to help you by holding it in place, or you can clamp it down. Be careful not to dig too deeply and damage the body or the binding. Scrape gently and remove a little bit at a time until the binding is level with the guitar.
The scraping will take a while, so you need to arm yourself with patience. It can also be relaxing as you’ll be making a repetitive motion, so it can feel like meditation. If you’re not a very patient person, you’ll have to brace yourself and just stick with it.
Once the top part is done, you have to get the sides. A razor will come in handy here because it’s easier to get every part with a smaller tool. This will also allow you to maneuver more easily and get fine cuts.
After everything is scraped well, you need to sand both the guitar and the binding to remove any bits and pieces that might be left. This will ensure you’ve got a nice flat surface you can easily paint over.
You can see the whole scraping and sanding process in this video:
9. Apply a Finish to the Guitar
Once your binding sits in its place, and the guitar is nicely smooth and sanded, you can paint it and finish the process. You can choose to paint over the binding or leave it as it is. Not painting over it will look a bit nicer, and you can see that most guitars are made that way.
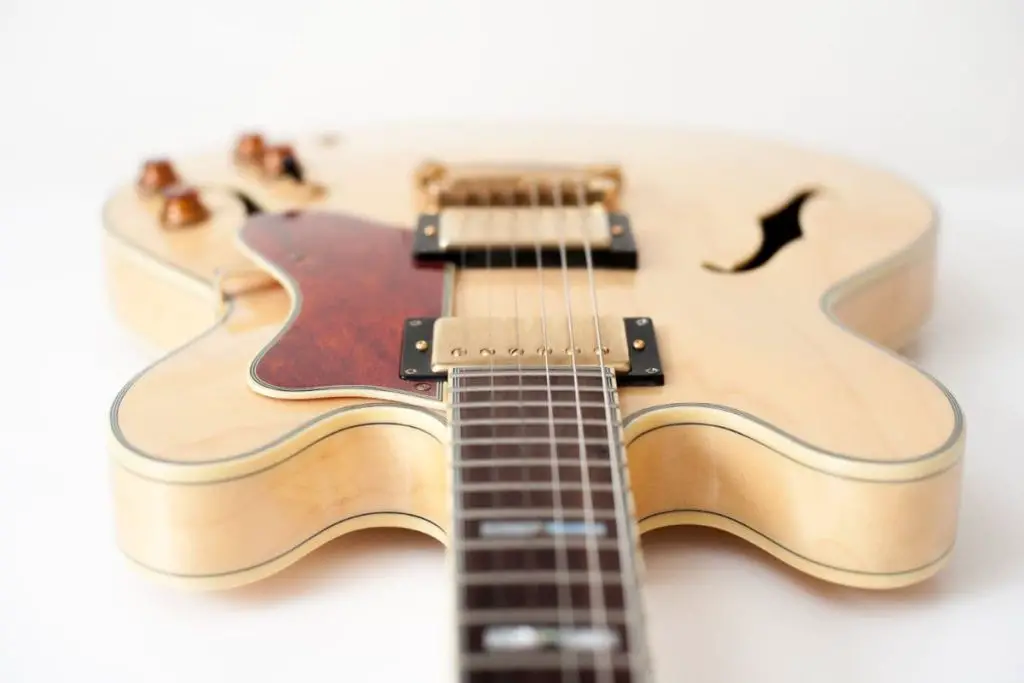
If you want to leave it as it is, you’ll have to cover it while painting. The easiest way to do this is to use a latex pinstriper’s tape. You can find it at any auto supply store. It comes in different widths, and it will follow the curves of your guitar nicely, so everything will be covered well.
If you don’t want to see it, simply spray paint over it. However, this is not advisable, as you’ll probably want to show off all that hard work you’ve put into your guitar, so painting over it is counterintuitive.
Final Thoughts
Putting binding on your electric guitar requires some time, effort, and hard work, but it can give you great results. Adding binding to your guitar while you’re building it will give it a cool stylish detail and make it stand out. It’s best to put it on a guitar while building it because you can otherwise damage your guitar instead of making it look better. Good luck with your guitar building!
How To Put Binding on an Electric Guitar: FAQ
Here are some common questions.
How do you replace an electric guitar binding?
Replacing an electric guitar binding can be a tricky process, and it’s recommended that you have some experience with guitar repair before attempting it. Here are the general steps involved in replacing an electric guitar binding:
- Remove the old binding: Carefully remove the old binding by heating it with a heat gun or hair dryer and using a scraper or knife to peel it off. Be careful not to damage the guitar’s finish or wood.
- Clean the guitar’s edge: Clean any adhesive residue or debris from the guitar’s edge using a scraper, sandpaper, or a solvent like naptha.
- Prepare the new binding: If your new binding is not pre-bent, you’ll need to bend it to the guitar’s shape. You can do this by heating it with a heat gun and carefully bending it by hand or using a bending jig.
- Glue the new binding: Apply a small amount of binding adhesive to the guitar’s edge and carefully press the new binding into place. Be sure to align it properly and press down firmly to ensure a good bond. You may want to use binding tape or clamps to hold the binding in place as it dries.
- Trim the excess binding: Once the binding is dry, use a small saw or file to carefully trim the excess binding flush with the guitar’s edge.
- Clean up and polish: Clean up any remaining adhesive or debris from the guitar’s edge and polish the binding with a soft cloth or guitar polish.
What kind of glue to use on guitar binding?
When replacing or repairing guitar binding, it’s important to use a high-quality, strong glue that is specifically designed for use with musical instruments. The most commonly recommended glue for guitar binding is Titebond Original wood glue, which is a strong, water-resistant adhesive that is ideal for gluing wood to wood.
Other types of glue that can be used for guitar binding include hide glue and cyanoacrylate (CA) glue. However, it’s important to use the right type of glue for the specific type of binding material, as well as to follow proper safety precautions and application techniques.
How do you install a fretboard binding?
Installing a fretboard binding is a complex and delicate process that requires precision and patience. Here are the basic steps to install a fretboard binding on a guitar:
- Remove the old binding (if necessary): If your guitar already has a binding on the fretboard, you’ll need to carefully remove it before installing the new binding.
- Cut the binding strips to the correct size: Use a razor blade or other sharp cutting tool to cut the binding strips to the correct size for your guitar’s fretboard.
- Bend the binding strips to fit the fretboard: Use a bending iron or other heating tool to heat the binding strips and bend them to fit the contours of the fretboard.
- Apply glue to the binding strips: Apply a thin, even layer of glue to the binding strips using a small brush or roller.
- Press the binding strips onto the fretboard: Carefully press the binding strips onto the fretboard, making sure they are aligned and in the correct position.
- Secure the binding with tape: Use tape to hold the binding strips in place while the glue dries. Be sure to use tape that won’t damage the finish of your guitar.
- Scrape and sand the binding: Once the glue has dried, use a scraper and sandpaper to remove any excess glue and smooth out the binding.
- Apply finish to the binding: Apply a finish (such as lacquer or oil) to the binding to protect it and give it a polished look.
What is the difference between purfling and binding?
Binding is a strip of material that is typically used to cover the edges of a guitar’s body, fingerboard, and headstock. Purfling is a thin decorative strip of wood that is inlaid into the binding. It is typically made of contrasting colored woods, and its purpose is purely decorative.
Purfling and binding are both decorative elements used in guitar making, but they serve different purposes.
Purfling is usually found on higher-end instruments and can be used to add a touch of elegance and complexity to the guitar’s appearance. It can also be used to cover the seam between the binding and the guitar’s top or back.
In summary, binding is a functional element used to protect the edges of a guitar, while purfling is a decorative element used to enhance the guitar’s appearance.
Can you add binding to a finished guitar?
In theory, it is possible to add binding to a finished guitar, but it is a difficult and complex process that requires a high level of skill and experience in guitar repair and modification. The process involves carefully cutting a channel for the binding and then gluing it in place with a strong adhesive.
This can be risky, as there is a chance that the binding could chip or crack the guitar’s finish during the installation process. Additionally, the binding may not adhere as well to the finished surface, potentially leading to a less secure and stable bond. As such, it is generally recommended to install binding on a guitar during the initial construction or as a part of a major restoration or repair project, rather than attempting to add it to a finished instrument.
What does binding do on an electric guitar?
Binding on an electric guitar serves both a functional and aesthetic purpose. Functionally, it helps protect the edges of the guitar’s body from nicks, scratches, and other damage that can occur during normal use. Aesthetically, binding can add an attractive accent to the guitar’s appearance, particularly when it contrasts with the color of the body wood.
Binding is typically made of a plastic material, such as ABS or celluloid, and can come in various colors and widths. It is usually applied to the edge of the guitar’s body, neck, and headstock using glue, and may be further secured with screws or nails. Overall, binding is an important component of an electric guitar’s design and can greatly enhance its overall look and durability.
What causes guitar binding to crack?
There are several factors that can cause guitar binding to crack:
- Temperature changes: When the guitar is exposed to extreme temperature changes, the wood and the binding can expand and contract at different rates, leading to cracks.
- Humidity changes: High humidity can cause the wood to swell, which can cause the binding to crack. Low humidity can cause the wood and the binding to dry out, leading to cracks.
- Age: As the guitar ages, the binding can become more brittle, making it more prone to cracking.
- Impact: If the guitar is dropped or bumped, the binding can crack as a result of the impact.
- Poor installation: If the binding is not installed properly, it can be prone to cracking.
What is the point of binding?
Binding is a decorative and functional element added to the edges of a guitar. It is used to cover the unfinished edge of the guitar’s body and protect it from wear and tear. It can also enhance the aesthetic appeal of the guitar by adding a contrasting color or design element to the body. Binding is commonly made of materials like plastic, wood, or celluloid and is typically applied to the top, back, and sides of the guitar. In addition to providing protection and visual appeal, binding can also help increase the resonance of the guitar by making the edges more stable and reducing the damping of the body.
Does binding affect guitar tone?
The binding on a guitar, by itself, does not have a significant effect on the guitar’s tone. However, the material used for the binding can affect the way the guitar’s body resonates, which could impact the overall sound. The main purpose of binding is to protect the edges of the guitar’s body from damage and to provide an aesthetic touch. Binding can also create a contrast between the top and back of the guitar and the sides, making the guitar more visually appealing.
What is binding on a guitar neck?
Binding on a guitar neck refers to a strip of material, usually plastic or wood, that is attached to the edge of the fingerboard. It is usually used to give the guitar a finished look, and can also provide some protection for the edges of the fingerboard. Binding on the neck can be purely decorative, but it can also have a functional purpose in terms of protecting the fingerboard from wear and tear, and helping to stabilize the neck. Some players also believe that the binding can affect the tone of the guitar, although this is a subject of debate among guitarists and luthiers.
If you want to find out what my recommended guitar gear is, then here is what I recommend on Amazon:
- Fender Cutaway Acoustic-Electric Guitar Bundle (MY FAVORITE GUITAR)
- Snark SN-8 Super Tight All Instrument Tuner (Easiest Tuner I’ve Used)
- 6 String Acoustic Guitar Capo (Best CAPO for quick changes)
- Dunlop Max Grip 1.0mm Nylon Picks (Thick Guitar Pick So You Don’t Lose Grip!)
- Universal Guitar Stand (Cheap & Minimalist Guitar Stand I Recommend)
- Levy’s 2″ Wide Quick Adjust Guitar Strap (Best Guitar Strap For Any Level)
Related Posts:

