Low-action guitars take away the tension in the strings, making the instrument easier to play, which is why most beginners prefer a low-string setting. However, low action has one major con – fret buzz. Is there any way to fix the issue, or does this mean you should not use low action at all?
To get a low action without fret buzz, you can fix neck tension, truss rods, bridge saddles, level uneven frets, trim any extra long string ends, try changing your playing technique, or check the pickup height. Temperature and humidity can also cause fret buzz with low action.
Fret buzz does not interfere too much if it is not too pronounced, in fact, many seasoned guitarists even learn to ignore the buzzing and play with low action. The trick is to know how to reduce the buzzing as much as possible. If you want to find out how to minimize fret buzz with low action, keep reading!
If you want to find out what my recommended guitar gear is, then here is what I recommend on Amazon:
- Fender Cutaway Acoustic-Electric Guitar Bundle (MY FAVORITE GUITAR)
- Snark SN-8 Super Tight All Instrument Tuner (Easiest Tuner I’ve Used)
- 6 String Acoustic Guitar Capo (Best CAPO for quick changes)
- Dunlop Max Grip 1.0mm Nylon Picks (Thick Guitar Pick So You Don’t Lose Grip!)
- Universal Guitar Stand (Cheap & Minimalist Guitar Stand I Recommend)
- Levy’s 2″ Wide Quick Adjust Guitar Strap (Best Guitar Strap For Any Level)

13 Tips To Get Low Action Without Fret Buzz
- Check the Strings
- Check the Truss Rod
- Check the Humidity Level
- Adjust for Temperature and Weather Conditions
- Level Uneven Frets
- Check Pickup Height
- Fix the Loose Pickup Cables in Semi-Acoustic Guitars
- Adjust the Bridge Saddles
- Don’t Be Too Hard on the Strings
- Trim Any Extra Long String Ends
- Adjust Nut Slot Height
- Find the Right Playing Technique
- Fix the Loose Knobs and Tuning Pegs
1. Check the Strings
Fret buzz is not always a setup problem; therefore, many guitarists even ignore the buzz if they do not hear it through the amp. However, for beginners, it may be too distracting.
So, let’s see how we can fix fret buzz with low action.
The first thing you can do is check the string gauge, which is the thickness of your string. The thickness affects the playability of your guitar and changes the tone and comfort level.
To reduce fret buzz with low action, you should get strings with a higher gauge, which means thicker strings. These have more tension which is important for reducing fret buzz. It takes more effort to pluck them, but their sound control will be better with low action.
2. Check the Truss Rod
A truss rod is a metal strip inside the guitar’s neck. The strip is located under the fretboard and runs along the neck’s length. The neck’s straightness depends on how tight or loose the truss rod is. If the truss rod is too tight, the neck can bend backward, creating fret buzz.
The truss rod nut can be found at the top of the neck or near the sound hole. If it is at the top, you will see a cover plate, which you can remove using a screwdriver. Once you remove the plate, you will see the truss rod nut.
You can move the nut clockwise or counterclockwise to tighten or loosen the rod to adjust the neck’s straightness.
Use an L-shaped truss rod wrench to rotate the nut. If you do not have this wrench, you can buy it from any guitar shop. You can even use a regular wrench to rotate the truss rod.
Once you have the wrench, you should hold the truss rod bolt or nut and rotate it.
- To tighten the rod, move the nut clockwise.
- To loosen the rod, move the nut counterclockwise.
You can keep adjusting the rod until the neck is straight enough without compromising low action. If the rod is too tight and the neck is bent backward, the strings will be too low even for low action, creating fret buzz.
You must make small movements (not more than a quarter turn) to turn the truss rod nut to avoid damage. Moreover, do not tighten the truss rod too much as it can break the metal strip and even the guitar’s neck. You’ll be in for an expensive repair if the truss rod or the neck breaks.
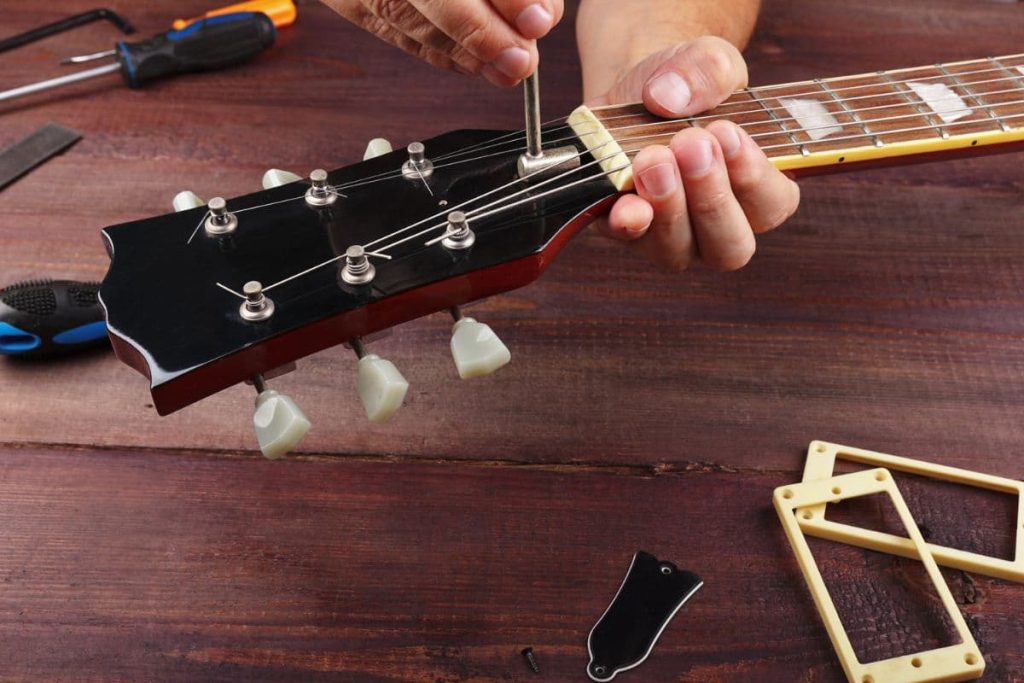
Important tips for truss rod adjustment:
- If the truss rod is in the sound hole, you may have to loosen the strings first. However, the one on the neck is easily accessible.
- Before adjusting the truss rod, measuring the action is a good idea. That way, you’ll have a reference point. You can do this using any measuring tool. Take the measurements at the first and twelfth fret under each string.
- Now turn the truss rod quarter turn at a time. You can compare the new action with the old one to see the difference.
3. Check the Humidity Level
Humidity level can also contribute to fret buzz, so storing the guitar in optimal conditions is important. The guitar’s wood can crack or warp when humidity is too high or low.
When the neck of the guitar warps, it makes the frets uneven by lowering one side of your guitar’s neck while the other side goes higher. This makes it challenging to play the guitar. Humidity can even cause mold to appear.
The ideal humidity level for an account guitar is between 45% to 55%. Anything over or below may damage the wood and the guitar’s playability.
There are different types of gadgets to help you check humidity levels.
- One of the best ways to control the guitar’s humidity is to keep it in a hard case. It protects the wood from moisture, dirt buildup, and dust.
- You can also keep humidity in check by using a two-way humidification. For example, Boveda 62% Humidor Packets (available on Amazon) control the humidity for two to six months and easily fit the guitar case, making them suitable for traveling.
- You can check the humidity level using a hygrometer, especially when you travel. Hygrometers like TempPro A50-2 Hygrometer (also on Amazon) are pretty accurate and easy to carry.
4. Adjust for Temperature and Weather Conditions
The temperature can also affect the sound and may require you to adjust the strings. If you played well with low action during winter, the same adjustment might not work in the summer.
The reason is simple: the guitar’s wood expands in hot temperatures and contracts in colder conditions. This change in temperatures can cause guitar warping, resulting in fret buzz.
Therefore, the same guitar tuning that works well in colder temperatures may not be good enough for warmer conditions.

5. Level Uneven Frets
Uneven frets are a common reason for fret buzz with low action. So, what are uneven frets?
When some frets on your guitar’s fretboard are higher than others, we call them uneven frets. Therefore, when you have low action, the strings vibrate against these uneven frets, causing fret buzz.
There are two reasons why your frets may be uneven:
- Manufacturing issue.
- Your guitar’s maintenance is poor.
There are different ways to level frets. If a single fret is loose, you can glue it back. However, in case of low frets, you may need to use proper tools for leveling.
To fix uneven frets, you may have to take all of them out, level the fretboard and then put the frets back. This can be an expensive repair. Moreover, you may do more harm than good if you’re not an expert. Therefore, it is best to let an expert level the frets.
You can use a fret rocker to check for uneven frets. It helps you compare frets’ height. Here is how you can detect uneven frets.
Hold the fret rocker vertically and place the bottom edge on the frets. Usually, a fret rocker covers three frets simultaneously. If the rocker lies flat without rocking forward or backward, all three frets are the same height.
6. Check Pickup Height
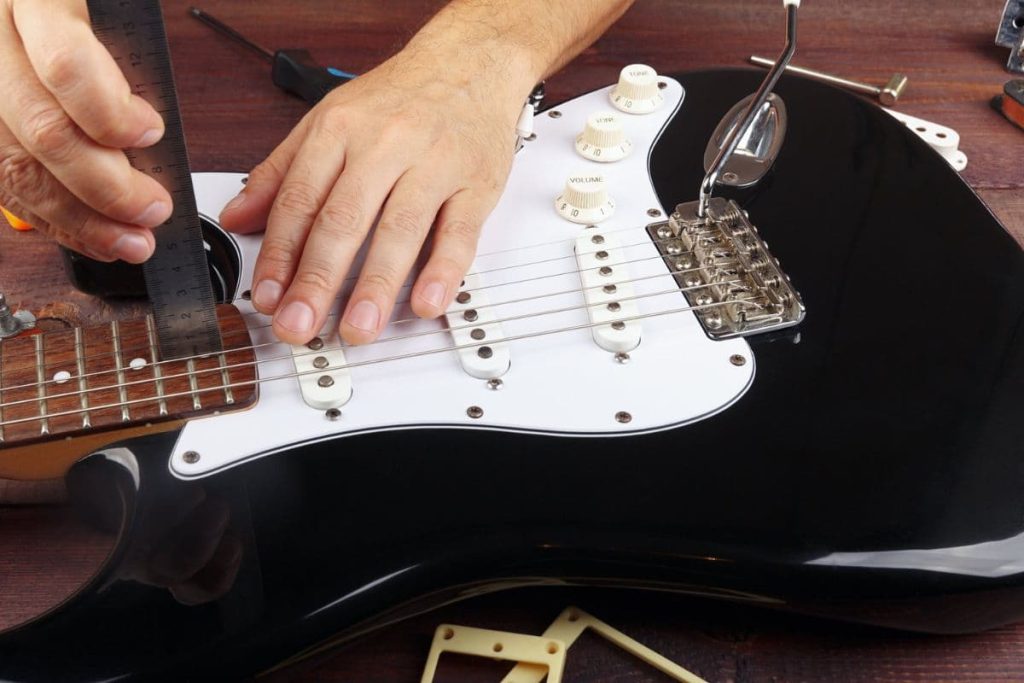
A guitar’s pickup is a device that converts vibrations from the strings into sound. Though more common in electric guitars, pickups are also found in semi-acoustic guitars for amplifying the sound.
If pickups are higher and closer to the strings, they can cause strings to vibrate against them, resulting in a buzzing sound. You can adjust the pickup height with the help of screws on the pickup mount. To lower the pickup height, you must turn the screws counterclockwise, and to raise them, turn the screws clockwise.
Most guitar pickups are located on the guitar’s body, under the strings, and on top of the sound hole. When pickups are visible, you can adjust them manually.
7. Fix the Loose Pickup Cables in Semi-Acoustic Guitars
In semi-acoustic guitars, pickups usually have cables running inside the guitar. When you play the guitar, those loose cables may hit the body on the inside, creating a buzzing sound. In this case, you must clip the wires properly to restrict their movement.
Pickups in semi-acoustic guitars may also have battery compartments. If the battery compartment’s cover is loose or the screw is not tight enough, it can also cause buzzing.
8. Adjust the Bridge Saddles
The bridge height can also cause fret buzz in electric guitars. You can adjust the bridge by moving the screws. If the bridge tension is too low, the strings become loose and touch the fret, causing fret buzz.
You can move the screws clockwise or anticlockwise to increase or decrease the tension and get the best string alignment for reduced buzzing.
Important tip for saddle adjustment: The radius of the saddle and the fingerboard must be the same. Electric guitars have built-in saddle adjustments, whereas in acoustic instruments, you must reshape the saddle to get the right radius.
9. Don’t Be Too Hard on the Strings
With low-action guitars, you must not pluck the strings too hard. When you yank or pull a string with excessive force, it creates a broader angle, and upon release, the string goes back with power, vibrating against the fret.
On the other hand, you will still get a buzz if you pluck the string too softly. Therefore, you must know how much pressure is enough. You can determine the correct pressure by experimenting with the strings and practicing regularly.
10. Trim Any Extra Long String Ends
String length usually becomes a problem with new strings. You get loose ends when you replace old strings with a new set. If these ends are too long, they can trouble you while you play.
The long ends can vibrate against each other or the neck, creating minor buzzing. You can trim these ends so they are short enough.
11. Adjust Nut Slot Height
Nut slot height is another factor to consider. If the nut slot is too low, the vertical distance between the strings and the first fret is too small, causing the string to vibrate against the fret. This creates fret buzz.
You can find many measurements online when it comes to the right nut slot height, but you should ultimately find that sweet spot where the strings do not rattle the frets.
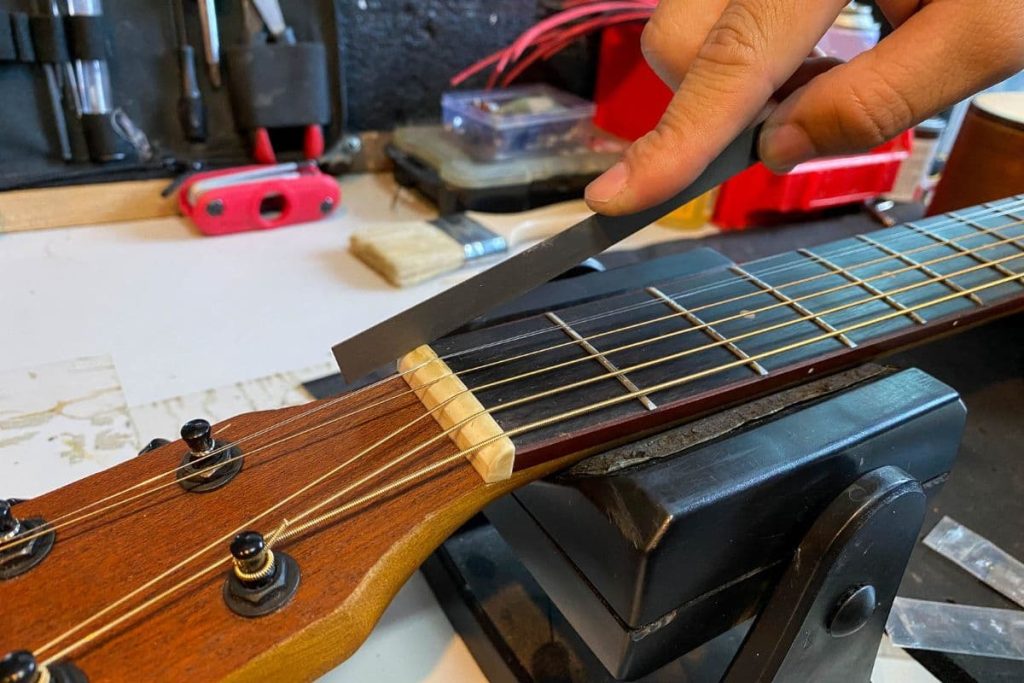
New guitars usually have high-cut nut slots, which you can lower as per your preference. However, if the slot is too low, you can fill it up using superglue, baking soda, or something similar and raise the height.
Important tip for nut slot height: Adjusting the nut and the string slots requires precision. You may have to file the individual string slots to lower the action. Once the slots are deep enough, you may have to file the top of the nut down, so the slots are not too deep.
Once you’re happy, you can tune your guitar and start playing.
12. Find the Right Playing Technique
If everything is fine with your guitar, but you’re still getting that annoying fret buzz, the fault could be in your playing technique. Pushing the strings directly on the fret usually causes fret buzz.
You can usually get the best and clearest sound when your string lands behind the fret. This means your fingers should not land on the fret but on the wood part between the two frets to avoid buzzing.
13. Fix the Loose Knobs and Tuning Pegs
Loose knobs and tuning pegs on your guitar can also cause buzzing. The sound may not be related to frets but ruins the overall playing experience. To avoid unnecessary buzzing, you must tighten all tuning pegs, knobs, and screws before you play.
What Is Low Action, and Why Is It Important?
Many beginners reject their first guitar because “it just does not feel right.” However, this is not always the guitar’s fault. The issue might lie in how high or low the strings are on the fretboard. This string placement is called the guitar action.
As a self-teaching beginner, getting to know guitar action is important because it affects how comfortable you feel while playing the instrument.
- High Action: When the vertical distance between the fretboard and the strings is larger, the guitar has high action.
- Low Action: When you reduce the vertical distance between the fretboard and the strings, you get low action. In low-action guitars, the strings are closer to the fretboard. However, low-action guitars have one major problem, fret buzz!
You can lower your guitar’s action yourself, but letting an expert do it is always better. You must know how to adjust the nut, bridge saddle, and truss rod to get low action.
Benefits of Low Action
Low or high action is a matter of preference. Both techniques are correct and have their share of pros and cons. However, you may want to start with low action as a beginner. Here are a few reasons why:
More Comfortable
You must have seen many newbie guitarists complaining about their fingers and how tough it is to play the guitar. Well, they are not wrong! This usually happens when the guitar has high action, which increases the string tension, making them harder to pluck.
Low action reduces this tension and makes the strings softer. The reduced tension allows you to easily hold a note and move between frets. It also lets you play higher up the neck.
More Flexibility
Low action makes it easier to play music with complex chords, which are difficult to hit on tight strings. This improves your flexibility and lets you play faster licks. You can also get better string bending and vibrato. Not to mention you’ll be able to expand your repertoire much quicker.
Better for Your Strings
High action creates more tension in the strings, which means you will have to yank the strings with force. This extra power stretches the strings, putting them out of tune. Low action, on the other hand, is easier on the strings.
Low-action guitars are suitable for soft playing. If you must go hard at the chords and play in a bigger space, perhaps going with a low action is not the right choice.
Understanding Fret Buzz
Have you ever heard that buzzing sound when you play your guitar? Well, that’s fret buzz.
But to understand it, first, let’s see what a fret is.
Frets are those thin metal strips you see on the guitar’s neck. The fret closest to the guitar’s headstock is the first fret, and the number goes up in ascending order.
So, now let’s see what fret buzz is.
Firstly, it is not a rare problem in electric and acoustic guitars. When you pluck or play a string with low action, it vibrates against the fret, making the buzzing sound, which we call fret buzz.
How To Get Low Action Without Fret Buzz: Conclusion
Low action improves your guitar’s playability by making the strings softer and easier to pluck. However, it also causes fret buzz. Therefore, to enjoy the low action, you must know what adjustments to make to minimize the issue.
If all else fails, don’t hesitate to contact a professional for help.
Here are some common questions.
Does low action cause fret buzz?
Low action on a guitar can cause fret buzz, but it depends on a number of factors, including the player’s playing style, the type of guitar, and the condition of the instrument.
“Action” refers to the distance between the strings and the fretboard. When the action is set too low, the strings can come into contact with the frets when played, causing a buzzing or rattling sound. This can be particularly noticeable on certain frets or when playing with a heavy touch or aggressive playing style.
However, fret buzz can also be caused by other factors, such as worn or uneven frets, an improperly set-up guitar, or a neck that is warped or twisted. If a guitar is experiencing significant fret buzz, it may be a good idea to have it inspected by a qualified guitar technician, who can diagnose the issue and make any necessary adjustments or repairs.
That being said, low action can be desirable for some players, as it can make the guitar easier to play and can improve intonation and tuning stability. It’s important to strike a balance between low action and fret buzz, and to make adjustments as needed to find the right balance for a particular player’s style and preferences.
How do I reduce fret buzz?
Here are some general steps that may help to reduce fret buzz:
- Check the action: If the action is too low, the strings can come into contact with the frets and cause buzzing. Raising the action slightly can help to reduce this issue. However, it’s important to strike a balance between action and playability, and to avoid raising the action too much, which can make the guitar harder to play.
- Adjust the truss rod: The truss rod is a metal rod that runs through the neck of the guitar and can be adjusted to correct for neck bow or curvature. If the neck is too concave or convex, it can cause fret buzz. Adjusting the truss rod can help to correct this issue, but it’s important to be careful and not over-tighten or over-loosen the rod, which can cause damage to the guitar.
- Check the frets: Worn or uneven frets can cause buzzing. Inspect the frets and make sure that they are level and in good condition. If necessary, have a qualified guitar technician dress or replace the frets.
- Check the nut and saddle: The nut and saddle are the parts of the guitar where the strings contact the fretboard and bridge, respectively. If these parts are worn or improperly set up, they can cause buzzing. Make sure that the nut and saddle are in good condition and are properly lubricated.
- Adjust the pickup height: If the guitar has pickups, the height of the pickups can affect the string vibration and cause buzzing. Adjusting the pickup height can help to reduce this issue.
How do you lower the action of a fret?
Lowering the action of a guitar’s frets can be a complex process that involves making adjustments to the neck, nut, and saddle of the guitar. It’s generally best to have this work done by a qualified guitar technician, who can diagnose the issue and make the necessary adjustments. However, if you are comfortable making adjustments to your guitar, here are some general steps for lowering the action of a fret:
- Loosen the strings: Before making any adjustments, it’s important to loosen the strings to reduce tension on the guitar’s neck and make it easier to work with.
- Adjust the truss rod: The truss rod is a metal rod that runs through the neck of the guitar and can be adjusted to correct for neck bow or curvature. To lower the action, you may need to loosen the truss rod slightly to reduce the curvature of the neck. It’s important to make small adjustments and to check the neck curvature regularly to avoid over-correcting or causing damage to the guitar.
- Adjust the saddle: The saddle is the part of the guitar where the strings contact the bridge. To lower the action, you may need to lower the saddle slightly. This can be done by sanding down the bottom of the saddle, or by adjusting the screws that hold the saddle in place. Again, it’s important to make small adjustments and to check the string height regularly to avoid over-lowering the saddle.
- Adjust the nut: The nut is the part of the guitar where the strings contact the fretboard. To lower the action, you may need to file down the bottom of the nut slightly. It’s important to make small adjustments and to check the string height regularly to avoid over-lowering the nut.
- Re-tune and test: Once you have made the necessary adjustments, re-tune the guitar and test the action to make sure it is comfortable and playable. It’s a good idea to test the guitar in different positions on the fretboard to ensure that the action is consistent across the entire range of the guitar.
How do you get the lowest action on a guitar?
Here are some general steps that can help to achieve the lowest possible action on a guitar:
- Adjust the truss rod: The truss rod is a metal rod that runs through the neck of the guitar and can be adjusted to correct for neck bow or curvature. To achieve the lowest action, you may need to loosen the truss rod slightly to reduce the curvature of the neck. However, it’s important to make small adjustments and to check the neck curvature regularly to avoid over-correcting or causing damage to the guitar.
- Adjust the nut: The nut is the part of the guitar where the strings contact the fretboard. To achieve the lowest possible action, you may need to file down the bottom of the nut slightly. It’s important to make small adjustments and to check the string height regularly to avoid over-lowering the nut.
- Adjust the saddle: The saddle is the part of the guitar where the strings contact the bridge. To achieve the lowest possible action, you may need to lower the saddle as much as possible. This can be done by sanding down the bottom of the saddle or by adjusting the screws that hold the saddle in place. However, it’s important to make small adjustments and to check the string height regularly to avoid over-lowering the saddle.
- Check the frets: Worn or uneven frets can cause buzzing and make it difficult to achieve low action. Make sure that the frets are level and in good condition. If necessary, have a qualified guitar technician dress or replace the frets.
- Check the neck joint: The joint between the guitar’s neck and body can affect the guitar’s playability and the action. Make sure that the neck joint is secure and properly set up.
How do I know if my action is too low?
If the action on your guitar is too low, it can cause buzzing and other playing issues. Here are some signs that your action may be too low:
- Fret buzz: If the strings are contacting the frets when played, it can cause a buzzing or rattling sound. This is particularly noticeable on certain frets or when playing with a heavy touch or aggressive playing style.
- Difficulty playing chords: If the action is too low, it can be difficult to play chords cleanly and smoothly, as the strings may be too close to the frets and can require extra effort to fret cleanly.
- Intonation issues: If the strings are too close to the frets, it can cause issues with intonation, as the strings may be more likely to go out of tune or produce incorrect notes.
- String slippage: If the action is too low, the strings may slip out of tune or be more likely to break, as there may be less room for the strings to vibrate.
- Inconsistent sound: If the action is too low, the guitar may produce an inconsistent or “muddy” sound, as the strings may be more likely to vibrate against the frets and cause unwanted overtones.
Can too much neck relief cause fret buzz?
Yes, too much neck relief can cause fret buzz on a guitar. Neck relief refers to the amount of curvature in the neck of the guitar, and if the neck is excessively curved or bowed, it can cause the strings to buzz against the frets.
When the neck has too much relief, the strings are too high in the middle of the neck, and too low at the ends of the neck. This can cause the strings to come into contact with the frets, particularly when playing notes in the middle of the fretboard. This contact can result in fret buzz, which is a rattling or buzzing sound that is produced when the strings hit the frets.
To fix this issue, the truss rod, which runs through the neck of the guitar, can be adjusted to correct the curvature of the neck. Loosening the truss rod can reduce the curvature of the neck and help to eliminate fret buzz, while tightening the truss rod can increase the curvature of the neck and raise the strings higher off the frets. However, it’s important to make small adjustments and to check the neck curvature regularly to avoid over-correcting or causing damage to the guitar.
It’s also worth noting that while excessive neck relief is a common cause of fret buzz, it is not the only factor that can cause this issue. Worn or uneven frets, a poorly adjusted nut or saddle, or loose hardware can also cause fret buzz and should be addressed as well. If you are experiencing significant fret buzz on your guitar, it’s a good idea to have the guitar inspected by a qualified guitar technician, who can diagnose the issue and make any necessary adjustments or repairs.
If you want to find out what my recommended guitar gear is, then here is what I recommend on Amazon:
- Fender Cutaway Acoustic-Electric Guitar Bundle (MY FAVORITE GUITAR)
- Snark SN-8 Super Tight All Instrument Tuner (Easiest Tuner I’ve Used)
- 6 String Acoustic Guitar Capo (Best CAPO for quick changes)
- Dunlop Max Grip 1.0mm Nylon Picks (Thick Guitar Pick So You Don’t Lose Grip!)
- Universal Guitar Stand (Cheap & Minimalist Guitar Stand I Recommend)
- Levy’s 2″ Wide Quick Adjust Guitar Strap (Best Guitar Strap For Any Level)

