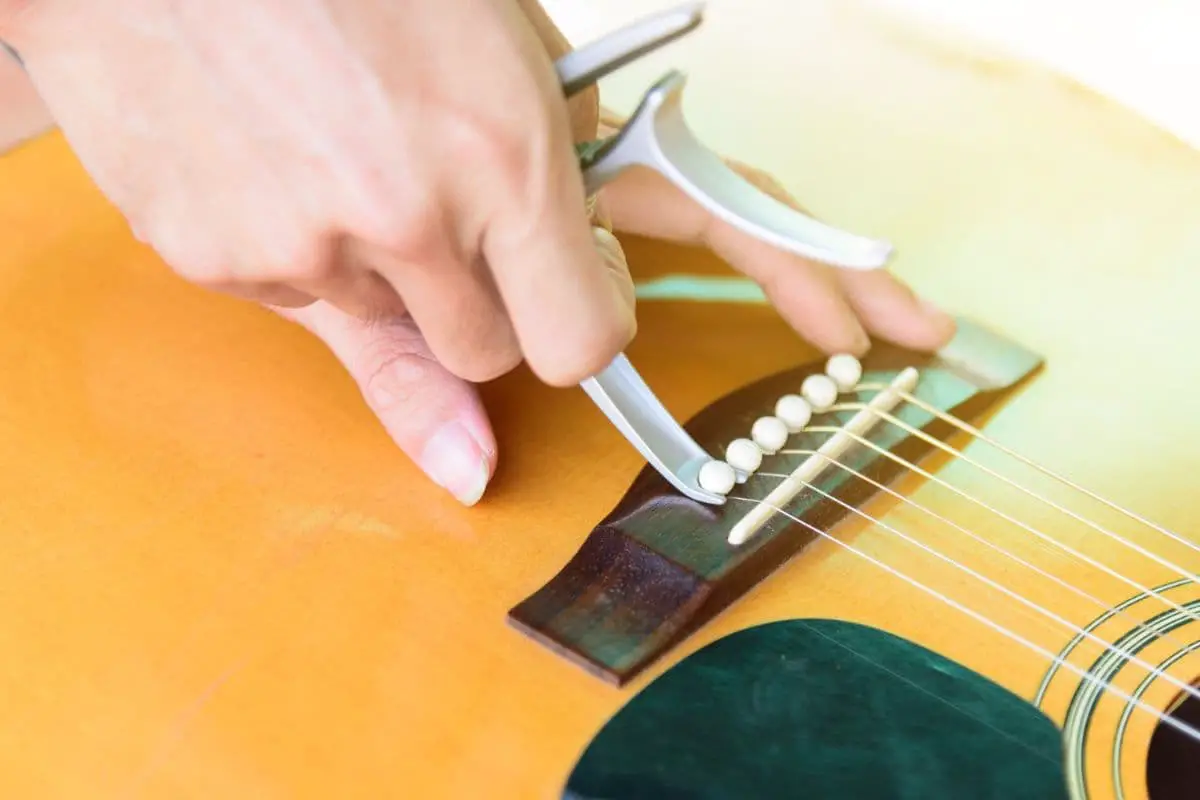
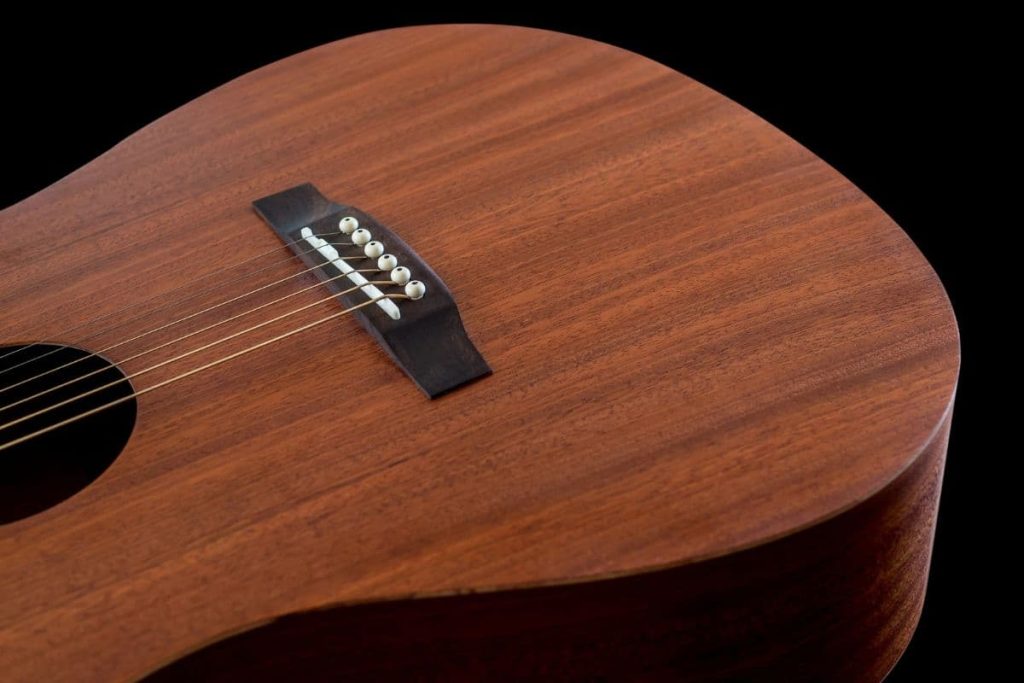
The bridge pins hold and support each string on your guitar. If the bridge pins are loose or won’t stay in place, you won’t be able to play your instrument. Loose, broken, or otherwise malfunctioning bridge pins are practically useless, so it’s important to find out how to stabilize them and prevent this issue from recurring.
To fix guitar bridge pins that won’t stay in, bend the string, pull it until the ball is touching the pin, then make sure the ball is in front of the top of the pin. You can also replace the bridge if it doesn’t support the bridge pins. Chipped pins need to be replaced; they can’t be repaired.
In this article, we’ll discuss multiple ways to fix your guitar’s bridge pins that won’t stay in. We’ll also talk about what causes this common issue so you can prevent it from happening.
If you want to find out what my recommended guitar gear is, then here is what I recommend on Amazon:
- Fender Cutaway Acoustic-Electric Guitar Bundle (MY FAVORITE GUITAR)
- Snark SN-8 Super Tight All Instrument Tuner (Easiest Tuner I’ve Used)
- 6 String Acoustic Guitar Capo (Best CAPO for quick changes)
- Dunlop Max Grip 1.0mm Nylon Picks (Thick Guitar Pick So You Don’t Lose Grip!)
- Universal Guitar Stand (Cheap & Minimalist Guitar Stand I Recommend)
- Levy’s 2″ Wide Quick Adjust Guitar Strap (Best Guitar Strap For Any Level)
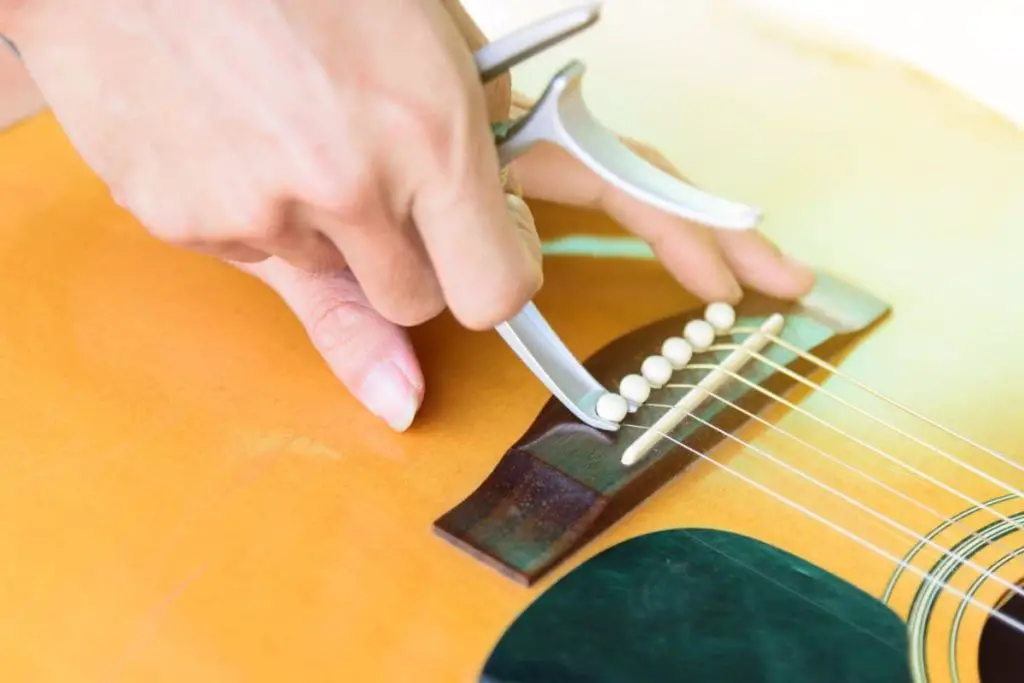
Bridge Pins Popping Out: How to Fix Guitar Bridge Pins That Won’t Stay In
Guitar bridge pins are small, tapered pegs that hold the strings in place at the bridge of an acoustic guitar. While they are designed to stay firmly in place, bridge pins can sometimes pop out, causing problems with tuning stability and string tension. Here are some steps to fix guitar bridge pins that won’t stay in:
- Remove the bridge pin: Gently pull the bridge pin out of the guitar bridge using a bridge pin puller or pliers. Be careful not to damage the pin or the bridge.
- Check the pin and bridge: Examine the bridge pin and the hole in the bridge where the pin is inserted for any damage or signs of wear. If the pin is damaged or the hole is worn, it may need to be replaced.
- Clean the pin and hole: Use a soft, dry cloth to clean the bridge pin and the hole in the bridge. This will help remove any debris or buildup that may be causing the pin to slip.
- Check the string: Make sure the guitar string is properly inserted into the bridge pin. If the string is not properly inserted, it can cause the pin to pop out.
- Adjust the fit: If the bridge pin is loose, you can try to adjust the fit by wrapping a thin strip of paper around the pin to increase its diameter. This will help to create a tighter fit between the pin and the hole.
- Replace the pin: If the pin is damaged or worn, it may need to be replaced. You can purchase replacement bridge pins online or at a local guitar shop.
- Reinsert the pin: Gently push the bridge pin back into the hole in the bridge, making sure it fits snugly and securely.
By following these steps, you can fix guitar bridge pins that won’t stay in and restore your guitar’s tuning stability and string tension. If the problem persists, however, it may be a sign of a larger issue with the guitar, and it is recommended to consult a professional guitar technician for further assistance.
1. Bend the String Under the Pin
Bending the string under the pin makes a huge difference. Not only does it change the pressure point on the string, but it also prevents the string from putting too much pressure on the bridge pin. When the string pulls the pin, it pops it out or loosens the pin quite often. You’ll notice this issue if the pin won’t stay in when you’re strumming harder than usual.
Here’s how to bend the string under the pin:
- Loosen the string and remove the bridge pin. Never remove a bridge pin when the string is tightened and secured to the tuning peg. Turun the tuning peg until the string is loose enough to remove by hand, then pry the bridge pin out of the bridge with a pin removal tool (you can also use pliers).
- Gently bend the string right under the ball at a 45-degree angle. Bending the string behind the ball keeps the ball under the bridge and neck rather than letting it put direct pressure under the pin. This slight angle keeps all of the tension under the bridge and body of the guitar instead.
- Slide the pin over the string, then push the string and pin into the bridge pin hole. You might have to curve the string inward if you have trouble keeping it in front of the pin rather than under the bridge. The ball should be as close to the pin as possible to prevent it from getting too loose when you tune the strings.
- Hold the bridge pin with one hand while you tune the string with the other. If you don’t hold the bridge pin while tuning the string, there’s a high chance that it’ll pop out of its hole. If it doesn’t, this slow process could make it too loose down the road when you’re performing, which is the last thing you need.
- Play the string a few times and tune it again if necessary. Strumming and picking a brand-new string will stretch it a bit. However, you might not experience this issue with old strings. You don’t always need to get new strings when applying these steps, though it’s the perfect time to do so.
2. Pull the String Tighter
It’s quite common to place the ball of the string under the bridge pin and forget about it. However, Strings Direct shows you have to pull the string while applying firm pressure to the bridge pin. You’ll undoubtedly leave a small amount of each string under the bridge. When you strum the guitar, the excess string will push the pin out of place.
Quick Note: When you pull the string to tighten it from the bridge pin, make sure you don’t squeeze it or wrap it around your hand. It can be tempting to try to get enough leverage, but bending the string will warp it and cause stress points. These points will bend and snap the strings within a couple of days, weeks, or months. It can also shift the bridge pins.
3. Replace the Bridge Pins
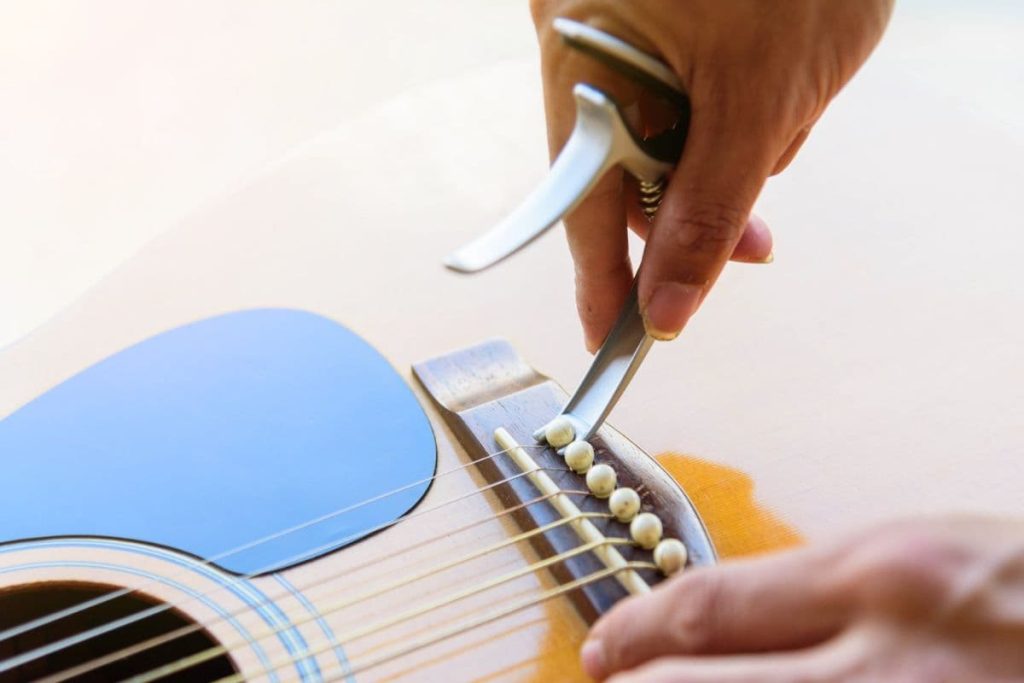
Replacing the bridge pins on your guitar is one of the easiest repairs you’ll come across. It’s also a surefire way to prevent old, worn pins from popping out. If the pin is damaged in any way, it’s time to replace it. Damaged bridge pins are misshapen, chipped, or broken in half. If the string slot is wider than usual, it won’t support the string.
Follow these steps to replace a bridge pin on your guitar:
- Loosen the string and inspect the damaged bridge pin. You don’t always have to replace bridge pins if they don’t stay in the guitar. There are many other reasons the pins won’t stay secure. However, minor scuff marks can make a big difference, which means it’s best to replace the pins.
- Choose a bridge pin designed for your guitar. Make sure the new bridge pin is the right dimensions. You should also take some time to ensure they have the same aesthetic design as the rest of them. You wouldn’t want one white bridge pin and five beige ones, or vice versa.
- Slide the string into the bridge pin’s slot with the ball facing toward the neck. As mentioned in the previous fixing suggestion, the string can be bent slightly. The ball should face inward since that’s the direction the open slot on the pin faces. If the ball goes the opposite way, the pin won’t hold it very well.
- Push the bridge pin until it’s flush with the bridge. Use your thumb to press the bridge pin while gently (but firmly) pulling the string toward the headstock. The pin’s head should be as close to the bridge as possible. While it’s best if the pin’s head touches the bridge, it’s not always required for larger strings.
- Hold the bridge pin while you tune the string. Pressing the bridge pin while tuning a new string will prevent it from pulling the pin out of place. Furthermore, it’ll let you stretch the string much easier. You can bend the string up and down after tuning it if you want to relieve some of the tension on the saddle, nut, and bridge pins.
4. Tune Your Strings Correctly
Proper tuning does a lot more than making your guitar sound good. It also prevents damage to the bridge, bridge pins, saddle, nut, tuning pegs, and fretboard. Supporting the bridge pins is one of the most important parts of tuning your guitar. The high, thin strings need plenty of support since the strings can easily pop out of the bridge pins.

Try this tuning method to make sure your bridge pins stay in:
- Remove the string from the bridge pin, then curve it inward. Curving the string prevents it from putting too much pressure under the pin. You don’t always have to apply this technique, but it’s a good habit to get into. It’ll keep your bridge pins secure until it’s time to change the strings again.
- Hold the bridge pin with your right thumb while tuning the guitar with your left hand. Never lift your thumb off of the pin until you’re done with this process. You can also keep your elbow on the pin if you want to stretch the strings with both hands, though this technique takes a bit of practice.
- With your thumb on the bridge pin, pick the string a few times, then bend it up and down to stretch it. You don’t need to do this if you’re not changing the strings. Strumming and fretting naturally stretch the strings, but why not expedite the process while fixing the bridge pin issue?
- Tune the string since stretching it can change its intonation. Every time you stretch your strings, they need to be tuned. This is one of many reasons you might have to retune the guitar every couple of weeks. The good news is that you’ll only need to make very minor adjustments for most of the strings.
- Push the bridge pin one last time. After tuning and stretching the strings, you might find that the pin elevates a little bit. Simply push it down with your thumb and play the guitar to ensure the pins don’t get too loose. You don’t need to press too harshly since the pins are likely held against the bridge.
5. Keep the Ball in Front of the Pin
Almost all guitar strings have a ball at the end. The ball is supposed to stay under the bridge pin, which prevents the string from sliding out of the pin’s slot. However, the ball often gets caught under the pin. When you push the pin directly over the ball, the ball will have plenty of upward force to push the pin out repeatedly.
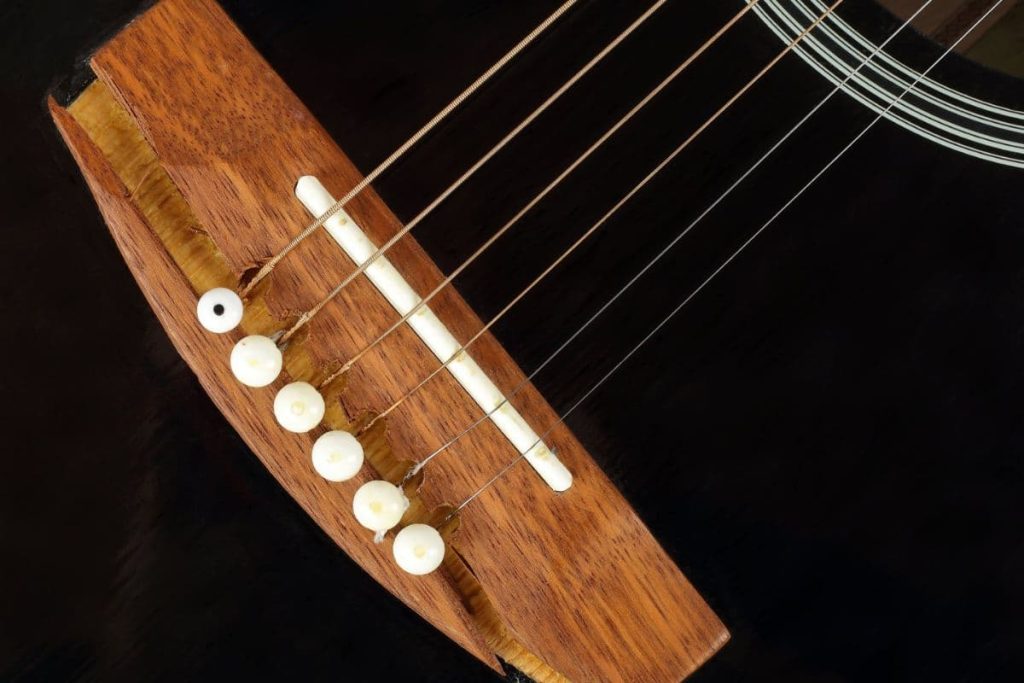
According to The Acoustic Guitarist, the easiest way to handle this situation is to put the ball in front of the pin. The front of the pin has an open slot for the string. Slide the string into the slot with the ball poking toward the open sound hole. You can reach your hand into the sound hole to ensure the ball stays in the right position.
Putting the ball in front of the pin also prevents backward pressure than can wear the bridge holes and damage the pins. This simple technique will help you when tuning the guitar, but it also saves you from a lot of unnecessary bridge repairs down the road.
6. Replace the Bridge
C Muse explains that replacing the bridge might be the only option to fix your loose bridge pins. If the bridge’s holes are worn or stripped, you won’t be able to use pins. While we recommend bringing your guitar to a local music shop for this complicated repair, you can DIY the replacement if you have the necessary tools.
Here’s the easiest way to replace the bridge:
- Place masking tape around the bridge. It’s important to use masking tape because you don’t want to soak or heat other parts of the guitar. Too much direct heat can cause long-term, permanent damage to your guitar’s body. Cover the whole area around the bridge with about four or five pieces of tape.
- Put a warm, wet cloth over the bridge. This step is crucial. If you skip it and head to the third step, you’ll risk damaging the guitar. The warm, wet cloth soaks the adhesive under the bridge, loosening it and making it much easier to remove. Keep it over the bridge for a couple of minutes, then head to the next step.
- Use a blow dryer to loosen the adhesive holding the bridge to the body of the guitar. Make sure you keep the wet cloth on the bridge while blow-drying it. Too much direct contact with hot air will harm the guitar. The wet cloth gets hotter with the blow dryer, further loosening the glue to help you remove the bridge.
- Push a putty knife under the bridge and lift it off the guitar. Putty knives are perfect for the job because they’re thin enough to get under the bridge, but they’re not too sharp. Using a regular knife will more than likely scratch the guitar. You can also use a thin spoon, though it’s a bit more difficult.
- Clean the guitar and use an adhesive to secure the new bridge to the instrument. Place the bridge exactly where the old one was. You should see an outline of where it was before you removed it. If not, you can also outline the bridge with a removable pen that you can wash off the instrument after installing the new bridge.
7. Handle the Bridge Pins Correctly
Mishandling the bridge pins will shorten their lifespan. It’ll also make it very difficult to place the bridge pin in the bridge without having it pop out every time you play the instrument. Most people don’t handle the bridge pins unless they’re changing the strings. Below, we’ll discuss a handful of helpful tips to keep in mind.
- Make sure the pin’s slot is facing directly toward the string to prevent unwanted tension.
- The bridge pin should face directly down, not at an angle.
- Each pin should go as far into the bridge as possible, though the thicker strings tend to elevate the pins a little above the bridge.
- Never try to bend or manipulate the pins; they’re incredibly fragile and can break or crack very easily.
8. Lower the Action
If the action is too high, it’ll put a lot of tension on the bridge pins. The constant tension will lift and remove the pins, which makes it very difficult to keep them in place. The good news is that there are multiple ways to adjust your guitar’s action. Before you change the action, make sure you have a ruler, a guitar file, and an Allen key.
So, what affects the action, and how can you fix it to help your loose bridge pins?
- If the saddle is too high, the action will be too high. Remove the saddle and file the bottom of it to reduce its height. The saddle holds the strings on the bridge, so it’s the last part of the action before the bridge pins. When it’s too high, the pins will be under a lot of excess tension and stress.
- If the nut is too high, the action will be higher than necessary. Much like the saddle, the nut can’t be too high above the neck. The nut sits at the top of the strings by the tuning pegs. Lower the nut by filing the underside by a couple of millimeters. Test the height, file the underside, and repeat as necessary.
- The truss rod can rotate, raising the action in the process. Use an Allen key to rotate the adjustment nut about ¼ of a turn. The adjustment nut typically sits inside the sound hole closest to the neck of the guitar. It’s easier to access when the strings are off, though it’s not necessary.
- Replacing the bridge with an oversized one will make the action far too high. Always make sure the bridge you get is a like-for-like model (or at least one that’s the same dimensions. A couple of millimeters can make a world of difference. Check with your guitar’s manufacturer if you’re unsure which bridges will work.
- If the bridge and the nut have shallow grooves, switching to thicker strings can slightly increase the action. Fortunately, all you have to do is use a guitar filer to deepen the grooves a little bit. Remember to keep the low E string about 2.8mm and the high E string about 2.0mm off of the fretboard near the bottom of the neck.
Final Thoughts
Bridge pins are some of the smallest and most overlooked parts of a guitar. While they’re not directly used in strumming or fretting, you can’t play the instrument without them. Ensuring your bridge pins are secure by tightening them correctly will keep your pins and strings in good condition for many years to come.
How do you fix a loose bridge pin?
To fix a loose bridge pin, follow these steps:
- Remove the bridge pin: Gently pull the bridge pin out of the guitar bridge using a bridge pin puller or pliers. Be careful not to damage the pin or the bridge.
- Clean the pin and the hole: Use a soft, dry cloth to clean the bridge pin and the hole in the bridge. This will help remove any debris or buildup that may be causing the pin to slip.
- Adjust the fit: If the bridge pin is loose, you can try to adjust the fit by wrapping a thin strip of paper around the pin to increase its diameter. This will help to create a tighter fit between the pin and the hole.
- Reinsert the pin: Gently push the bridge pin back into the hole in the bridge, making sure it fits snugly and securely.
Why is my bridge pin loose?
There can be several reasons why a bridge pin is loose in your guitar’s bridge. One possible reason is that the pin is worn or damaged, and is no longer able to fit tightly in the bridge. Another possibility is that the hole in the bridge has become enlarged or damaged, which can prevent the pin from fitting properly. Additionally, if the guitar strings are not properly installed in the bridge pin, this can also lead to the pin becoming loose over time. Finally, changes in temperature or humidity can cause the wood in the guitar to expand or contract, which can affect the fit of the bridge pin. If you are experiencing issues with a loose bridge pin, it’s important to address the problem promptly to ensure that your guitar remains in proper working order.
How do I keep my guitar pegs from slipping?
If you’re experiencing issues with guitar pegs slipping, follow these steps to help prevent this problem:
- Make sure the strings are properly installed: Check to ensure that the guitar strings are properly installed in the pegs. If the string is not wound correctly around the peg, this can cause the peg to slip.
- Clean the pegs: Use a soft, dry cloth to clean the guitar pegs. This will help to remove any debris or buildup that may be preventing the pegs from gripping the strings properly.
- Use string lubricant: Apply a small amount of string lubricant to the pegs to help reduce friction and prevent slippage.
- Replace worn pegs: If the pegs are worn or damaged, they may need to be replaced. New pegs can help ensure a tight fit and prevent slipping.
- Check for changes in temperature or humidity: Changes in temperature or humidity can cause the wood in the guitar to expand or contract, which can affect the fit of the pegs. If you are experiencing slippage, check the environment in which your guitar is stored and adjust as necessary.
By following these steps, you can help prevent guitar pegs from slipping and ensure that your guitar remains in proper working order. If the problem persists, it’s best to consult a professional guitar technician for further assistance.
Can I glue my bridge back in?
If the bridge on your guitar has become loose or detached, you may be wondering if you can glue it back in place. While it is possible to use glue to reattach a bridge, this is generally not recommended unless you have experience working with guitar repairs.
Gluing a bridge back in place requires careful attention to detail, as the position of the bridge affects the intonation of the guitar. Additionally, using the wrong type of glue or applying too much glue can damage the guitar and compromise its sound quality. If you are not familiar with guitar repair, it’s best to leave the job to a professional guitar technician.
If you do decide to attempt to glue the bridge back in place yourself, be sure to use a high-quality wood glue that is specifically designed for musical instruments. Use only a small amount of glue, and be sure to clamp the bridge in place until the glue has fully dried. Again, it’s recommended to seek the assistance of a professional if you are not experienced with guitar repair.
How tight should bridge pins fit?
When installing bridge pins on your acoustic guitar, it’s important to ensure that they fit snugly in the bridge. The pins should be tight enough to hold the string in place, but not so tight that they become difficult to remove or cause damage to the guitar.
Ideally, the pins should fit snugly in the bridge, with no visible gaps or wobbling. You should be able to insert the pins easily by pushing them in with your fingers, but they should not fall out or slip when you tune the guitar. It’s important to avoid forcing the pins into place, as this can cause damage to the bridge or the pins themselves.
If you find that your bridge pins are too loose, you may need to replace them with new pins that fit more tightly. Alternatively, you can try wrapping a small piece of tape around the base of the pin to increase its diameter and provide a tighter fit. Just be sure to remove the tape when you replace the strings to avoid any residue buildup on the bridge.
If you want to find out what my recommended guitar gear is, then here is what I recommend on Amazon:
- Fender Cutaway Acoustic-Electric Guitar Bundle (MY FAVORITE GUITAR)
- Snark SN-8 Super Tight All Instrument Tuner (Easiest Tuner I’ve Used)
- 6 String Acoustic Guitar Capo (Best CAPO for quick changes)
- Dunlop Max Grip 1.0mm Nylon Picks (Thick Guitar Pick So You Don’t Lose Grip!)
- Universal Guitar Stand (Cheap & Minimalist Guitar Stand I Recommend)
- Levy’s 2″ Wide Quick Adjust Guitar Strap (Best Guitar Strap For Any Level)
Related Posts:

